I was recently asked to create the banner for the largest Photoshop and Lightroom group on Facebook. Quite an honour.
I wanted to do something special and came up with a dozen clever ideas, some of which will form their own mini-projects in the future, but in the end I went for simplicity.
The members of this Facebook group (in excess of 210,000 and climbing daily) come from all nations, and joined for a wide range of reasons. Some want to share their work. Some seek praise. Some want help or advice. Others want to critique (or be critiqued), and still others are simply seeking inspiration. Some are professional photographers. Some just bought their first camera. It’s quite the mix of skill levels, styles, nationalities and cultures.
Searching for a theme
With such diversity, creating something that appeals to all could be a challenge. So I went back to basics and looked for common ground. Regardless of background, styles, or skill levels, the one thing we have in common is the love of editing photos.
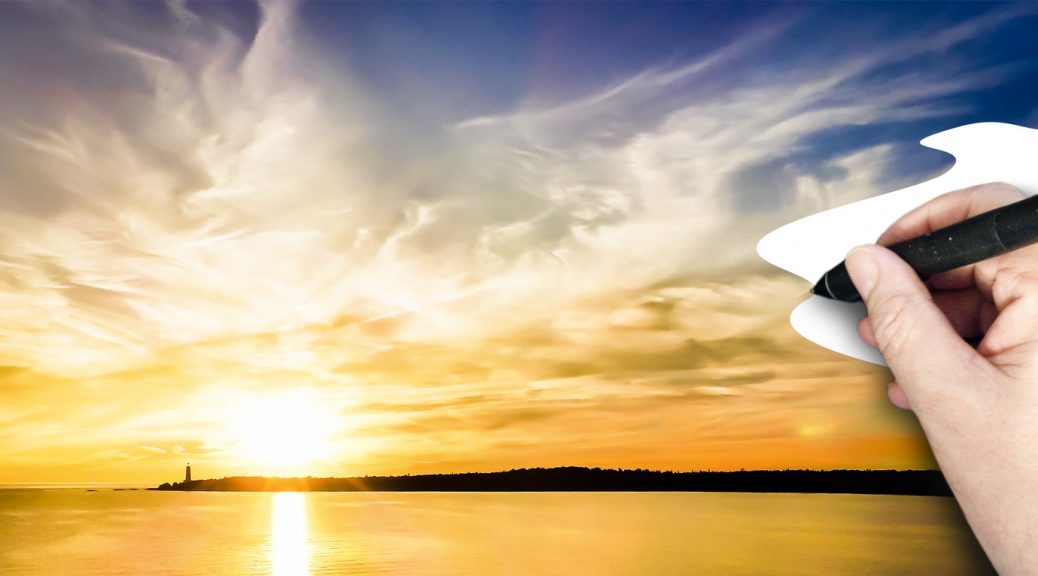
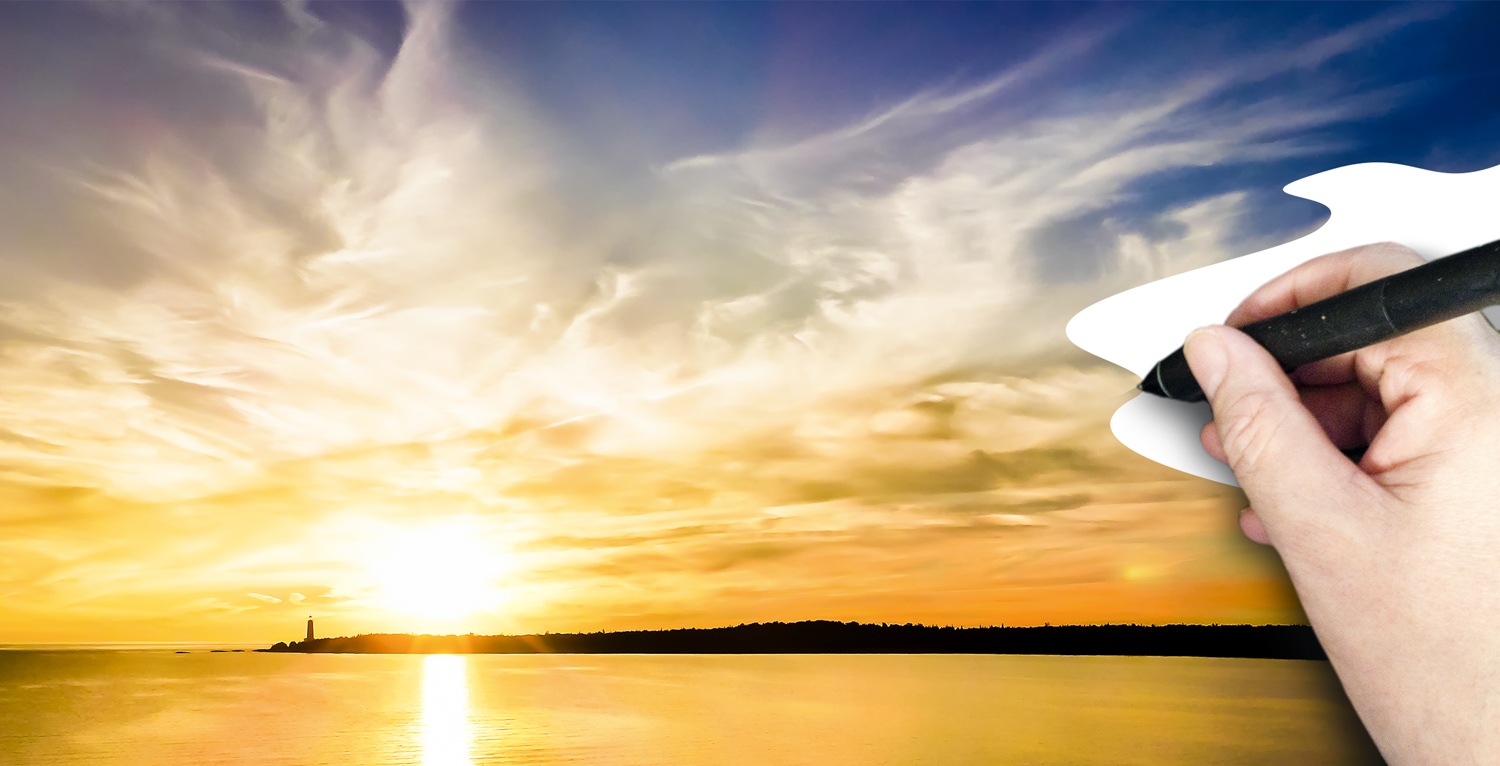
Whether they use Lightroom, or Photoshop, or both, everyone in the group in one way or another paints with pixels. So, I reasoned, what could be more representative of the group than an image showing exactly that?
This image was shot from the deck of the Chi-Cheemaun ferry on the way from Tobermory, Ontario to Manitoulin Island last year. That was a road trip worthy of many blog posts. My wife and I returned with some amazing memories… but that’s another dozen stories.
The hand holding the graphic pen is my own, photographed with my iPhone while sitting here at my desk. I placed it into the image as a separate layer and masked out the tablet and other parts that I didn’t need.
I used the pen tool to draw a vector mask around the sunset image, which reveals the white background layer I added below it. This now looks like a blank canvas being filled as I digitally paint in the sunset.
It’s a simple but powerful concept that, I feel, resonates with everyone. I’m happy, and so is the owner of the group. Win!
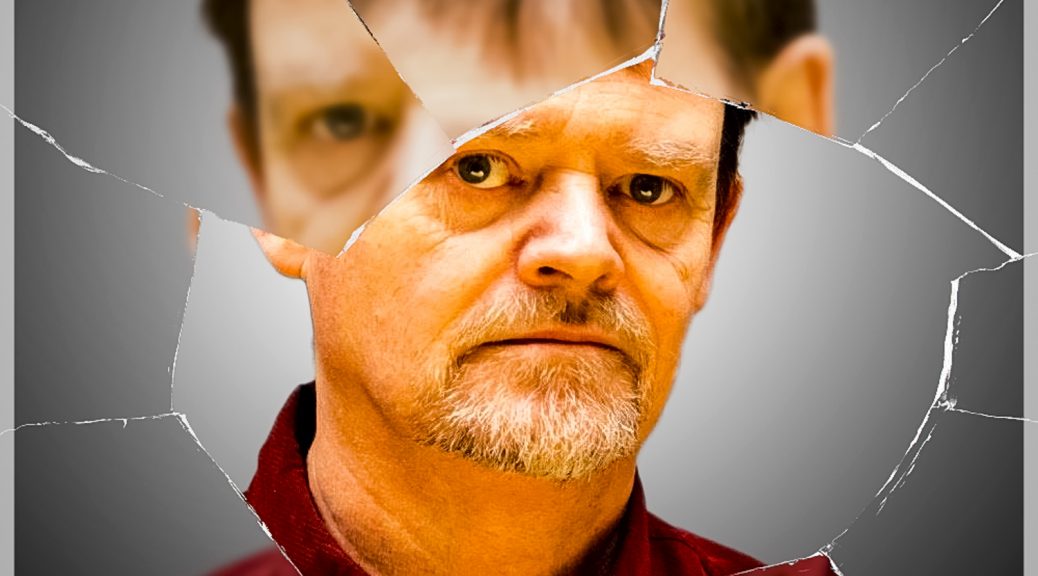
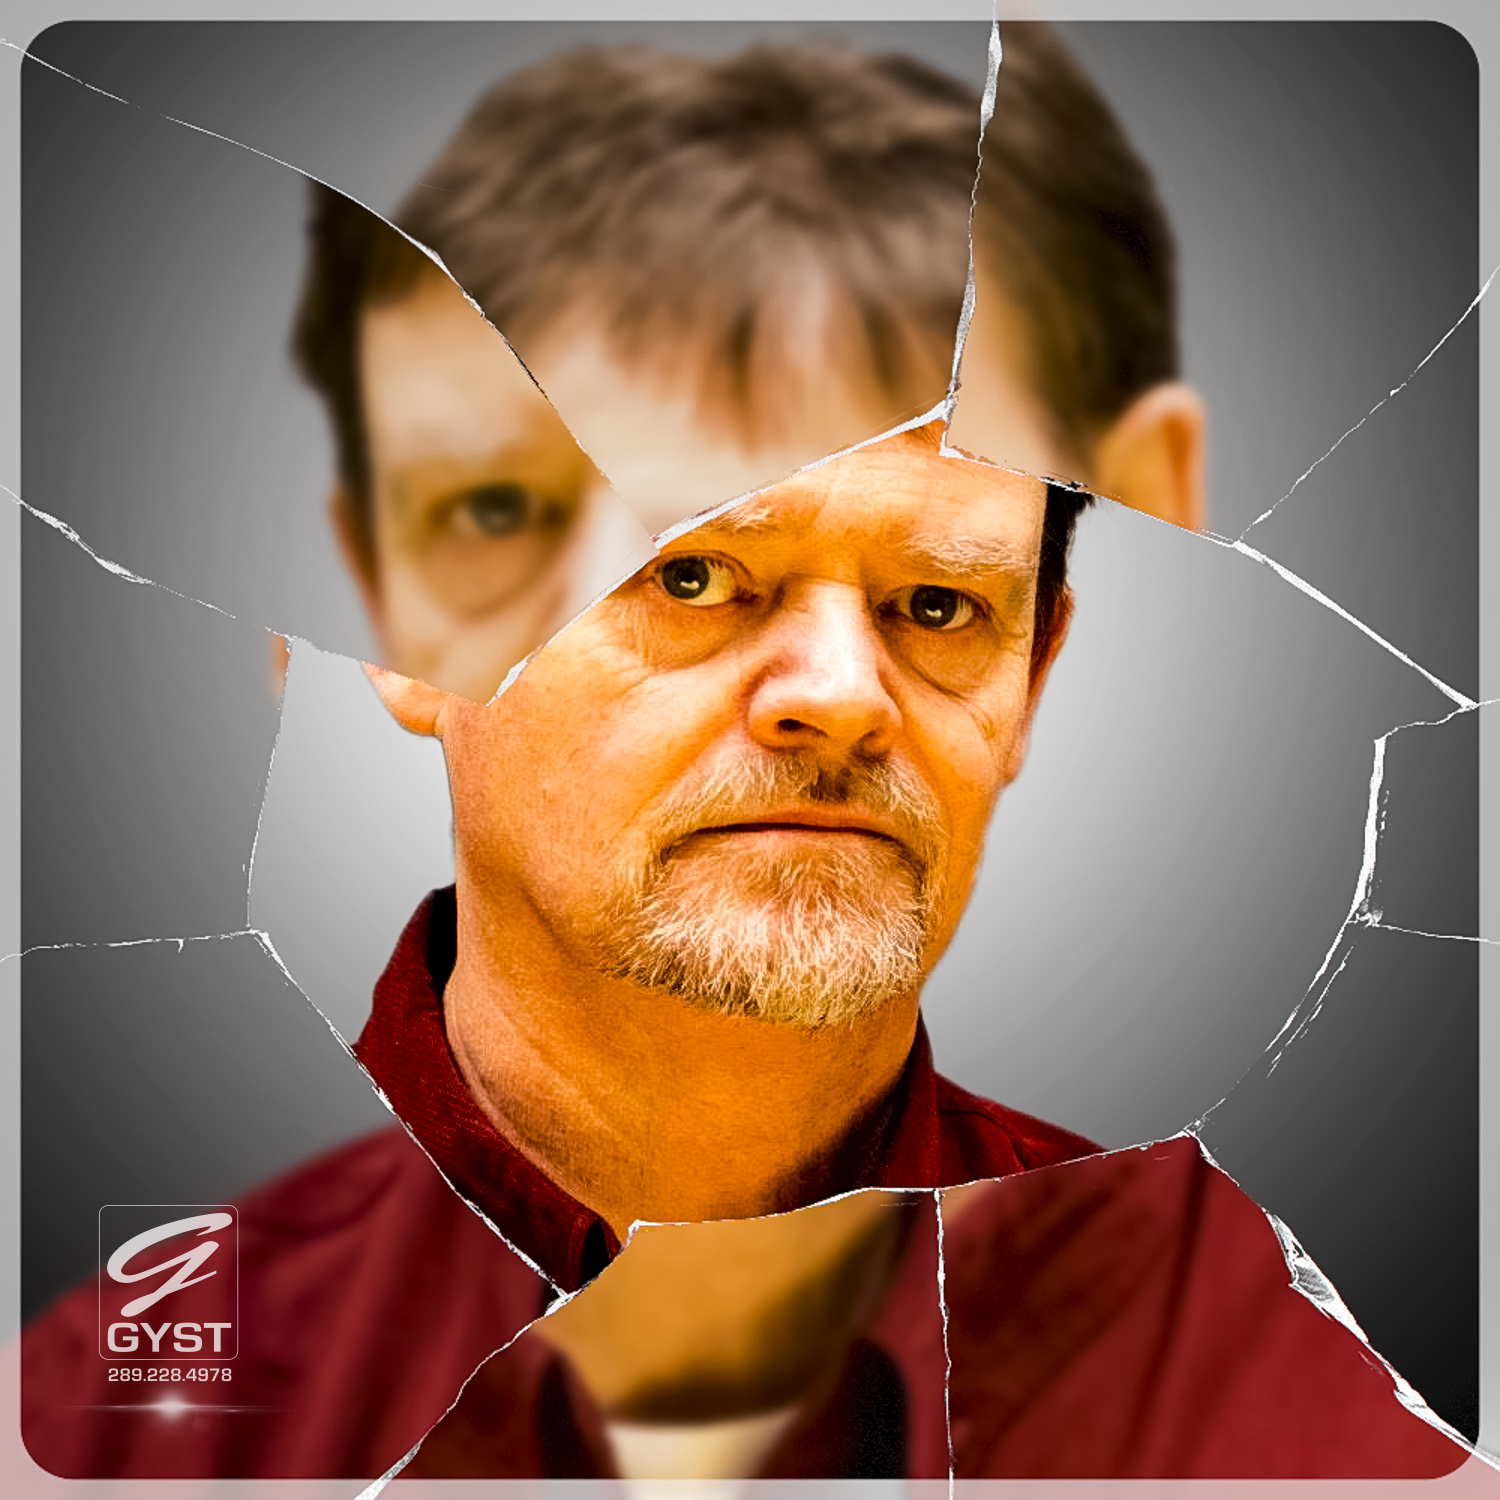
I call this item Cracked Actor, after the 1974 David Bowie song and film. In the film, a drug addled Bowie plays the superstar to his adoring audiences throughout a live tour. He is clearly suffering on many levels, but you would never know that from his stage performance. He puts on a great show. And that is a pretty good metaphor for life.
All we see is the face a person chooses to present to the world. Not the real person, hiding in plain sight. We may get a rare glimpse through the armour in times of weakness, but normally our smiles stay painted on. Unless and until something shatters inside.
As you go through your day you pass many people, each going through their own struggles. Some big. Some small. Financial worries, addiction, grief, medical problems. It’s a long list. And none of that pain is visible from the outside. Just the smile.
I try to take a breath before hurling anger or bitterness at another person. Though perhaps justified, it may be that the person who just bumped you and spilled your coffee may be coming back from a funeral. The distracted driver that nearly wiped you out could be on the way to a hospital. Take a breath. Take two. You’ll live.
You may one day be that coffee spiller or distracted driver. You could be the addict, the outpatient, the parent. It could be you. Or a loved one. You may never know their stories. And you don’t need to. It’s none of your business. How you react, is.
It costs nothing to bite your tongue for a second. Be a better person. Make the world a better place. Remember this, the next time someone upsets you: We are all cracked actors. Every one.
Nikki and I created a personal Christmas card to send to friends and family which generated a lot of interest and questions along the lines of “How did you do that?!” Here’s the answer: Magic.
No? OK. Spoilsport. A classic Photoshop technique, then. Here’s how it works.
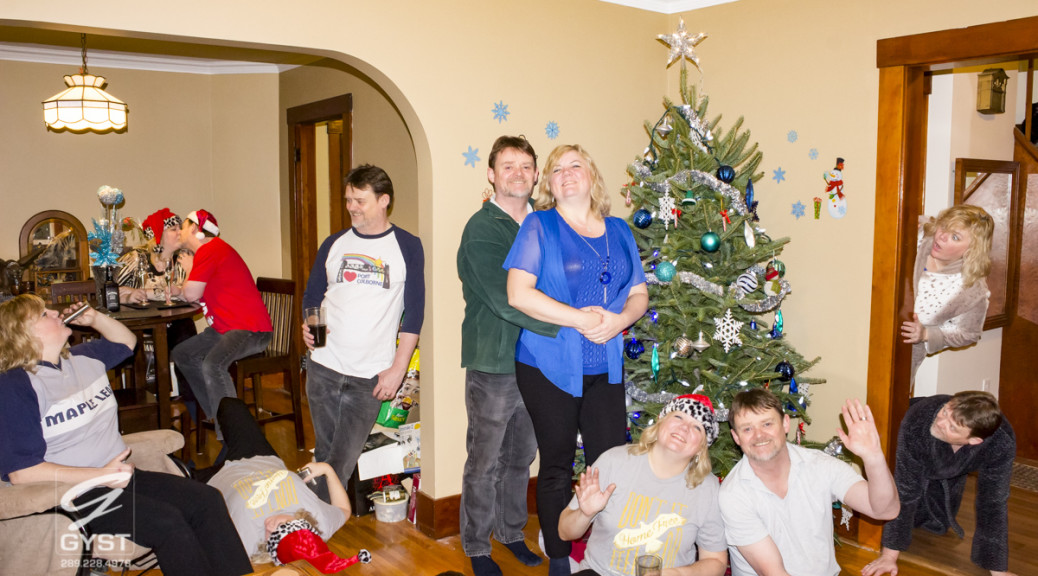
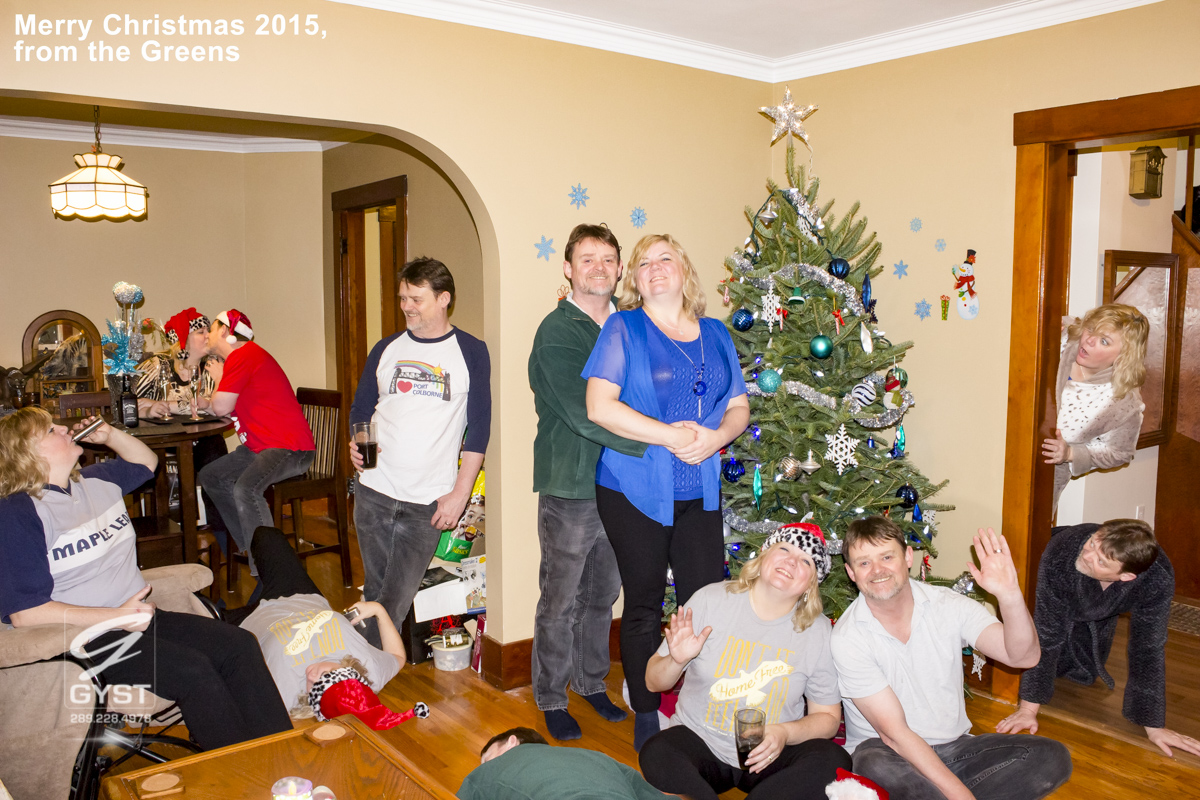
First, the practicalities. Set up your camera on a tripod so that the field of view covers everything you eventually want to include. A little forethought goes a long way, here. Visualizing the end result saves time and lets you plan all the shots you will need, and where things need to be. A tripod or some stable platform is vital. The camera must not move in between shots, and you will need one shot for every time you want to appear in the final image. That’s the trick. Multiple photos of the same room. Only the people move.
For this image, I wanted it to look as though the homeowners had been disturbed, and came downstairs to find a party in full swing. My variation of “The Night Before Christmas”, where in this case, nothing was moving, not even a mouse…except for the party in the living room. That’s why we have the bathrobes on. I framed the composition so that it included the door frame (so we could be seen peeking around it) and the dining room (so we could be seen at the table).
Then, it was time to play dress up. We changed several times in between shots and had a lot of fun improvising around the plan – Nikki came up with the hip flask (empty, by the way!) and I came up with the unconscious revelers on the floor. She even got in the Maple Leafs. Regrettably they were not sponsoring us.
For best results, full manual mode works best, and is in fact almost essential if you want to avoid a lot of post processing adjustments. Focus the camera on the main point of interest (here, that’s the tree) and set your aperture to at least f11 or higher to make sure the depth of field is sufficient to encompass the whole room. You don’t want out of focus people, do you? A couple of test shots will help you bracket the correct exposure to set ISO and shutter speed. Manual mode means the camera will not change setting between shots, so they will all be exposed the same way. Once focused, make sure you turn off autofocus, which would otherwise make each shot different. It is meant to look like a single image and nothing kills that magic quicker than multiple focal points.
Some cameras have remotes, which let you trigger the shot from across the room. Others have 10 second timers. Whatever works for your setup, enjoy the fun and take as many shots as you need, at leisure. There is no time limit or rush, since the camera settings are locked. The only consideration would be if you did this during the day with sunlight coming through the windows. The sun moves faster than you think and the lighting coming through windows moves with it. That can make it difficult to match things up in Photoshop later, so I would recommend an evening shoot after sunset – no moving shadows, consistent lighting. A simple tip, but it may save you a lot of hair pulling and gnashing of teeth.
I think we took around a dozen images. The ones you don’t use, just discard. It’s all part of the fun. Once you have all your images, it’s time to take them into Photoshop.
Open each image as a separate layer. If your tripod was steady, and your manual exposure was set correctly and autofocus was turned off, each image should be almost the same. The camera never moved, nor did the room, and the lighting was unchanged. Just the people moved. So the actual room is the same in every shot.
Choose the focal image of the bunch and move it to the bottom of the layer stack. I used the shot of Nikki and I in front of the tree, standing up. Turn off all but this bottom layer. It is your base image. Then turn on the first layer above it. This will hide your base image, so ALT-click the Mask icon to give this upper layer a ‘hide all’ mask. This should hide the topmost layer and show the bottom layer again. Then take a brush, and paint with white on the black mask of the upper layer. Paint where the people in that image are seen and they should magically appear as you paint.
Go through each successive layer in the same way and your room will soon be filled with party goers. Job done!
The tricky part is the part which really sells the image:. The part where you seem to be standing in front of or behind yourself. That takes some finessing. Zoom in close on each mask and work slowly. It may help to temporarily reduce the opacity of the layer you are working on so you can see the layer beneath. Feather your brush – real life photos do not have sharp edges. It’s a fact.
As you can see from the card above, with a little effort you can produce a great effect which is more time consuming than difficult.
For us, including taking the photos, changing clothes, taking them into Photoshop and doing the manipulations needed, the whole thing took around two hours. Granted, after working with Photoshop for so long, it’s second nature to me. I work fast, I had all the shots in my head before I ever set up the tripod, and that made it much easier. Nikki, by the way, is a fantastic model to work with.
With some forward planning an image like this should not take a long time at all to create and… so what if it did? This is a labour of love. And of course this same technique can be used in many other ways. Play volleyball on the beach with yourself. Give yourself a jumping high-five. As I type, I’m thinking it would be fun to punch myself in the face. Not literally, but wouldn’t that be a great image?
We found this a fun way to spend part of an afternoon, and by wasting two lazy hours on a Sunday afternoon we now have a memorable Christmas card, and a lasting image that will always be uniquely ours. You can’t buy that off the shelf.
Merry Christmas, one and all. From the Greens. All of us. 🙂
While developing some new creative techniques in Photoshop I was throwing pixels around to see if I could achieve the effect I wanted. I could. Yay. And as I worked those pixels, for some reason an overheard phrase kept floating into my mind. “We designed it to be so simple a child could use it.”
So I grabbed my pen and started to work anew. I found myself coming up with this concept, which I am now developing for one of the companies in our medical division. It depicts the ease of use of our SaaS and cloud services, avoiding all the usual tech heavy text and sales patter commonly found in such adverts.
This concept is not about bandwidth, capacity, security or features. It’s about how it feels to use the software.
It feels like being a kid again: Like stepping right out of the phone and away from technology: Like working from the beach: Like being a kid running through a field of grass, stress free.
This captures sunshine and freedom and a whole new way of working. Follow our bouncing ball, Pied Piper style, to new horizons and new adventures only made possible by this brave new world. Sorry, went into marketing mode for a minute. In a nutshell, it’s so simple a child could use it. I think I hit my target.
The question is: Does it work? Discuss.
Click to view at a larger size. Feel free to leave comments. Thanks!
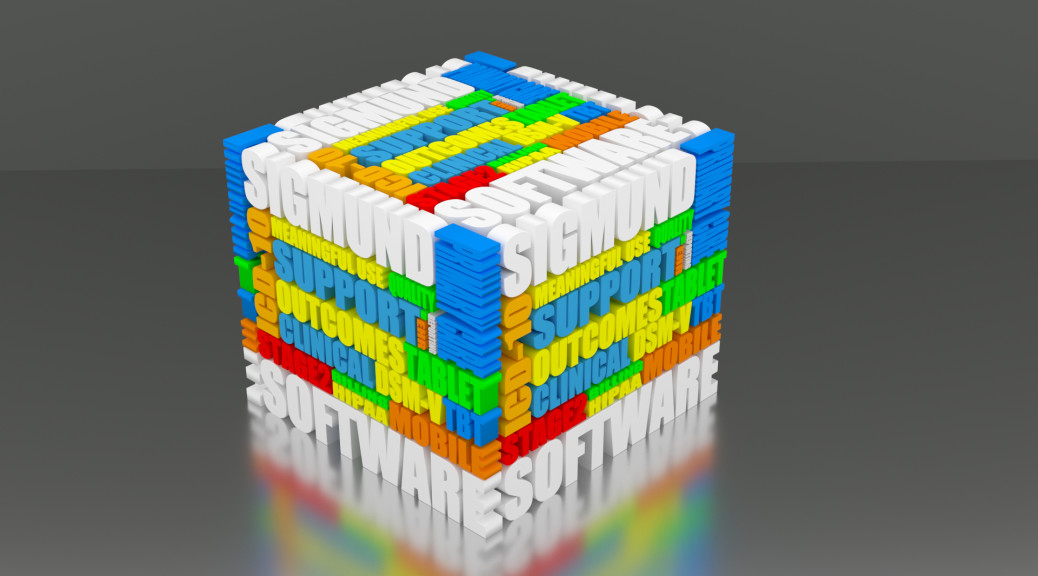
Another experiment in 3D rendering, this cube takes my existing Cube concept to a whole new level. A different direction, a new look. I like it. I like it a lot.
The flexibility offered by adding dedicated 3D software into my repertoire is amazing. Not so much for photo realistic renders, I’m not interested in that. For design. I can use the techniques I am developing here for a huge range of possibilities.
For example, I discovered that this Cube looks just as amazing from the inside. Standing on one of the letters and looking up, it looks like a cityscape scene right out of a Lego movie. Just add characters. Or, the view from inside a toy box. Add a youngster raising the lid and staring down in wonderment. It’s just a matter of scale.
Using 3D software I can take this cube and render it anywhere, at any size, under any lighting conditions. I can break it apart, hide faces, view it from any angle, any distance. And I can do this for any cube, not just this one. Different words. Different worlds.
I used Illustrator, Blender 3D, and Photoshop to create this. Finding the best workflow to use these together was a learning curve of design decisions. Now I have that workflow down, I can recreate this or anything like it at will. That could prove very useful. It’s a valuable skill set that I’m glad I spend time developing.
Suddenly it seems there are no limits to what I can achieve.
None.
How cool is that?
(Click this photo for the even bigger picture. You’ll be glad you did.)
I don’t get as much time as I would like to work on personal projects. Well, strictly speaking I do, it’s just that I have to be in the right frame of mind, and that can be elusive after a solid day in front of the camera / computer doing the commercial work that pays the bills.
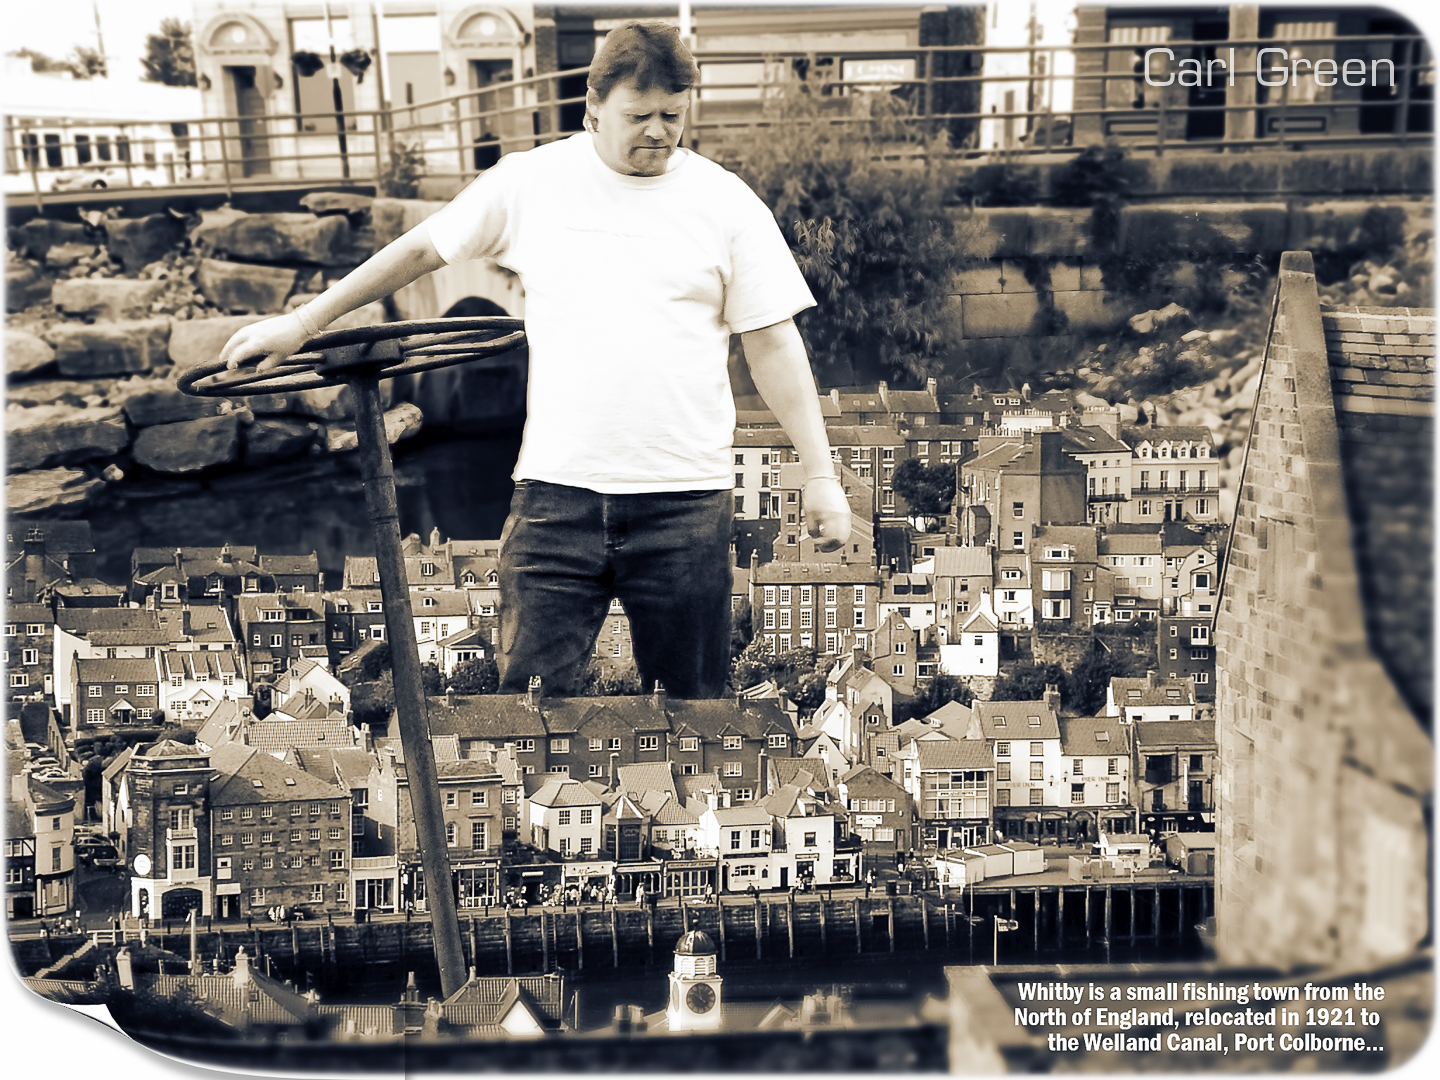
I composited this image from several source images, not all of them ideal, but I made it work. The shot of Whitby harbour was taken the last time I was there, from the famous Abbey walls, home of the Dracula legend. The view from here really is quite breathtaking and I recommend it to anyone visiting the area.
While in Whitby you should check out the Magpie restaurant. Famous nationwide for the best Fish and Chips, and most of the TV crews that film around the area eat here, so you may bump into someone famous. You can see the Magpie in this image if you look closely. I can. Follow my eyes. I’m looking right at it!
Click to see this image in its full glory
When the composite was finished I tried to come up with a colour tone that set it off to best effect. I maxed saturation, tried photo filters, HDR and high contrast, low and high key variations. All the usual variations. None of them worked for me, and since this is my project I wanted it to look my way, so I kept going until I came up with this retro look. I like.
Intended to look aged, as though clipped from an old newspaper and stored in an attic for almost a hundred years. For some reason, that resonated with me and seemed the best look for this image. I guess that’s the frame of mind I’m in today. All good. Enjoy.
Many people will see a photographers’ work and say “Wow! You must have a great camera!”
That’s like telling a world class chef that he must have a nice oven.
Waving the camera around is the comparatively easy bit. When you get the photos into the computer, that’s when the magic begins.
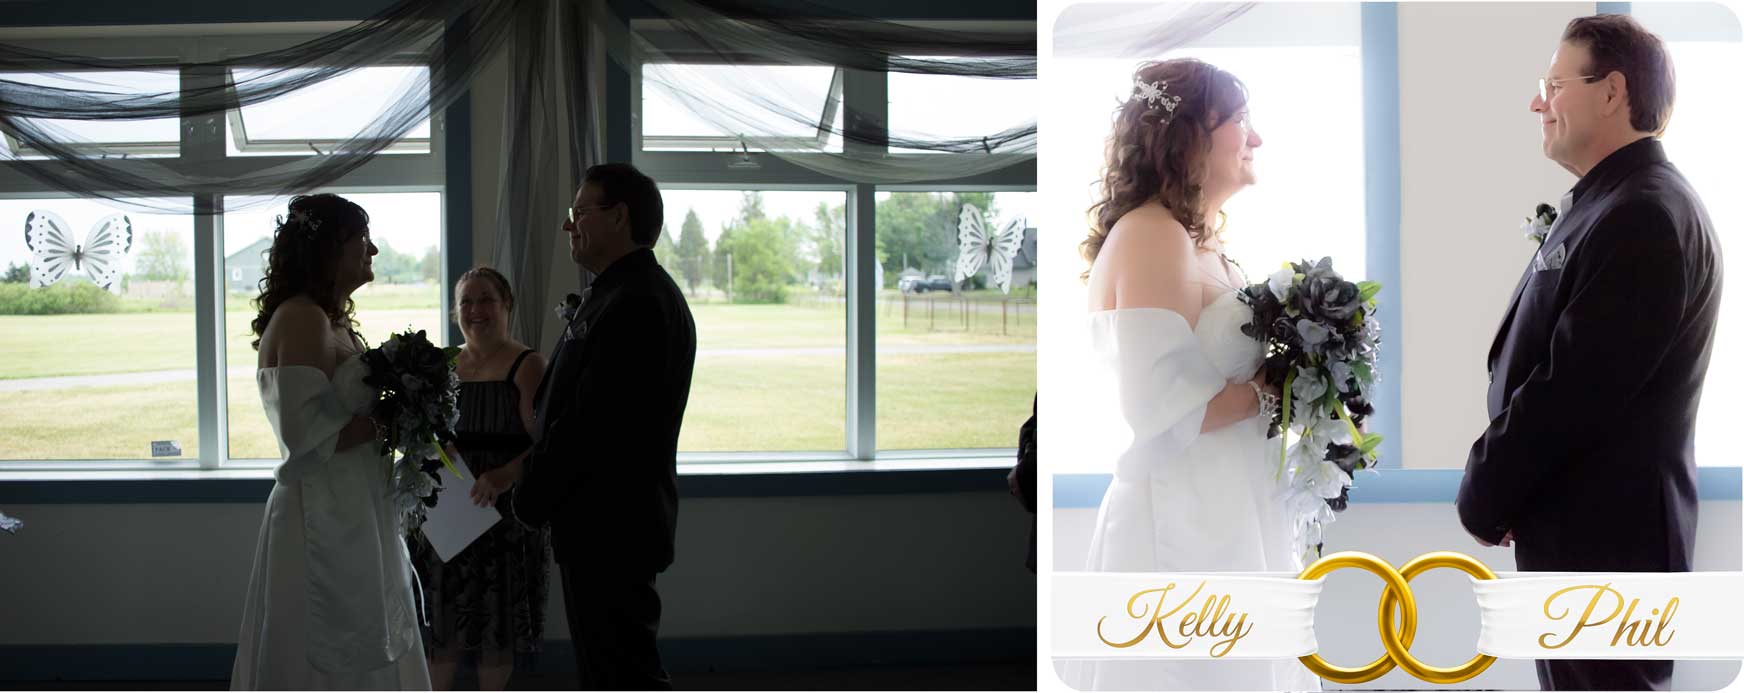
Take this photo. Very difficult lighting, the sun through the windows was silhouetting the happy couple. Without blasting the flash and ruining the ceremony, you have to adjust your strategy. I exposed for the outside light knowing that when I adjusted in post the windows would be blown out to white, giving me a beautiful soft glow, correctly exposed faces, and no distracting greenery.
I didn’t stop there. The minister standing between the bride and groom was also far too distracting. Her smiling face was the natural focus of the photo, but I wanted to show the love in the eyes of these two as they gazed at each other. They were the only people in the world at this moment. The minister, a wonderful woman, had to go.
Click for larger image.
This is where Photoshop skills come in. Removing the minister using a combination of masking and the healing brush, I then clone stamped the window frame and wall in place and adjusted the shading to match the scene. I tweaked the colouring, adjusted the RGB curves, and used some adjustment layers to add warmth. After adding the ribbon and linked rings, I used my favourite script font to add their names in gold, and finished the whole thing with some final tweaks in Perfect Effects. After applying some noise reduction and sharpening, it was done. An hour well spent, and on to the next photo. You cannot do all that with just a camera. Even a great one.
The high resolution version of this ‘after’ photo became the cover for the wedding album.
It is something the happy couple will be able to look back on at their 50th anniversary, and smile. It is their perfect memory. That was the plan. That is always the plan.
Last Saturday, May 30 2015, I was asked to be the wedding photographer for two friends. As anyone that has been in this position knows, this rarely ends well. All kinds of things can go wrong, and long-term friendships can turn into long-term bitterness. Fortunately, that is not going to happen here.
Kelly and Phil have been together for some time. They finally decided to tie the knot at the Bethel Community Centre in a low-key event attended by a select group of friends and family. No releasing of doves. No ticker-tape cannons. Just a minister and the people they loved. And it went well. Very well. Continue reading A Toast to the Newlyweds→
Been so busy over the summer, with my day job and weekend work shooting weddings and such that I haven’t added anything to either this blog or the web site in quite some time. Well, today that changed.
I’ve added a new section to the site which features some of my Photoshop work. I called it Before and After, because it features a selection of images showing the original photos and how they looked when finished. A slider overlay lets you compare the two on top of each other. Pretty nifty. I may expand this section, as there are many good photographers, and there are many good Photoshop artists, but for some reason the two skill sets come together rarely. I think I may be on to something here, especially when I also have the skills to put finished artwork on to a wall mural, car decal or coffee table photo book. Which brings me nicely to the second thing I added today…
I’ve added a selection of photos from a wedding I shot in June (thanks to Aaron and Kat for their permission) to a new page in the Photography section, which can be found HERE. Click any image to see it closer. I shot over 700 photos that day, and as you can imagine they took some time to work through. These are some of my personal favourites. I also made a photo book for the happy couple, and hard and soft covers are available for viewing or purchase using the links below. When I gave the newly-weds their hardcover photo book I also presented them with a framed 16 x 20 poster of them walking smiling back down the aisle. The poster has already been given pride of place on their main wall. I know, because they sent me a photo of it.
It’s been a busy summer. Nice to have time to get back to what passes for normal around here. Now, I probably should get to work on my own wedding photos, it’s only four weeks to our first anniversary…