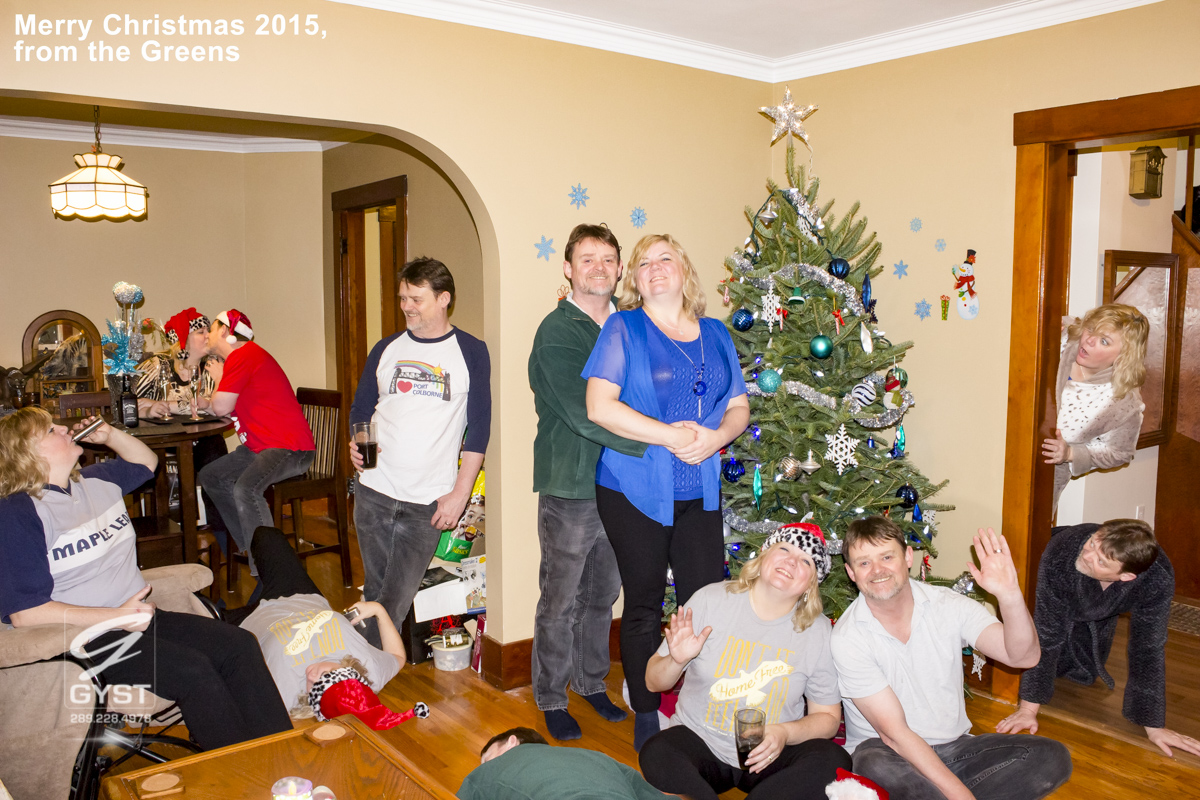
Nikki and I created a personal Christmas card to send to friends and family which generated a lot of interest and questions along the lines of “How did you do that?!” Here’s the answer: Magic.
No? OK. Spoilsport. A classic Photoshop technique, then. Here’s how it works.
First, the practicalities. Set up your camera on a tripod so that the field of view covers everything you eventually want to include. A little forethought goes a long way, here. Visualizing the end result saves time and lets you plan all the shots you will need, and where things need to be. A tripod or some stable platform is vital. The camera must not move in between shots, and you will need one shot for every time you want to appear in the final image. That’s the trick. Multiple photos of the same room. Only the people move.
For this image, I wanted it to look as though the homeowners had been disturbed, and came downstairs to find a party in full swing. My variation of “The Night Before Christmas”, where in this case, nothing was moving, not even a mouse…except for the party in the living room. That’s why we have the bathrobes on. I framed the composition so that it included the door frame (so we could be seen peeking around it) and the dining room (so we could be seen at the table).
Then, it was time to play dress up. We changed several times in between shots and had a lot of fun improvising around the plan – Nikki came up with the hip flask (empty, by the way!) and I came up with the unconscious revelers on the floor. She even got in the Maple Leafs. Regrettably they were not sponsoring us.
For best results, full manual mode works best, and is in fact almost essential if you want to avoid a lot of post processing adjustments. Focus the camera on the main point of interest (here, that’s the tree) and set your aperture to at least f11 or higher to make sure the depth of field is sufficient to encompass the whole room. You don’t want out of focus people, do you? A couple of test shots will help you bracket the correct exposure to set ISO and shutter speed. Manual mode means the camera will not change setting between shots, so they will all be exposed the same way. Once focused, make sure you turn off autofocus, which would otherwise make each shot different. It is meant to look like a single image and nothing kills that magic quicker than multiple focal points.
Some cameras have remotes, which let you trigger the shot from across the room. Others have 10 second timers. Whatever works for your setup, enjoy the fun and take as many shots as you need, at leisure. There is no time limit or rush, since the camera settings are locked. The only consideration would be if you did this during the day with sunlight coming through the windows. The sun moves faster than you think and the lighting coming through windows moves with it. That can make it difficult to match things up in Photoshop later, so I would recommend an evening shoot after sunset – no moving shadows, consistent lighting. A simple tip, but it may save you a lot of hair pulling and gnashing of teeth.
I think we took around a dozen images. The ones you don’t use, just discard. It’s all part of the fun. Once you have all your images, it’s time to take them into Photoshop.
Open each image as a separate layer. If your tripod was steady, and your manual exposure was set correctly and autofocus was turned off, each image should be almost the same. The camera never moved, nor did the room, and the lighting was unchanged. Just the people moved. So the actual room is the same in every shot.
Choose the focal image of the bunch and move it to the bottom of the layer stack. I used the shot of Nikki and I in front of the tree, standing up. Turn off all but this bottom layer. It is your base image. Then turn on the first layer above it. This will hide your base image, so ALT-click the Mask icon to give this upper layer a ‘hide all’ mask. This should hide the topmost layer and show the bottom layer again. Then take a brush, and paint with white on the black mask of the upper layer. Paint where the people in that image are seen and they should magically appear as you paint.
Go through each successive layer in the same way and your room will soon be filled with party goers. Job done!
The tricky part is the part which really sells the image:. The part where you seem to be standing in front of or behind yourself. That takes some finessing. Zoom in close on each mask and work slowly. It may help to temporarily reduce the opacity of the layer you are working on so you can see the layer beneath. Feather your brush – real life photos do not have sharp edges. It’s a fact.
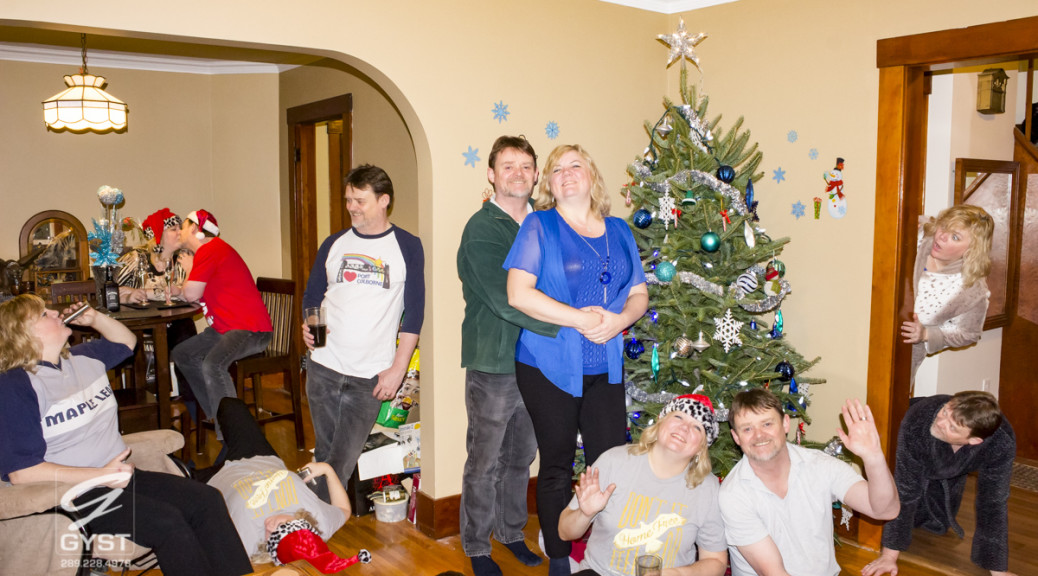
As you can see from the card above, with a little effort you can produce a great effect which is more time consuming than difficult.
For us, including taking the photos, changing clothes, taking them into Photoshop and doing the manipulations needed, the whole thing took around two hours. Granted, after working with Photoshop for so long, it’s second nature to me. I work fast, I had all the shots in my head before I ever set up the tripod, and that made it much easier. Nikki, by the way, is a fantastic model to work with.
With some forward planning an image like this should not take a long time at all to create and… so what if it did? This is a labour of love. And of course this same technique can be used in many other ways. Play volleyball on the beach with yourself. Give yourself a jumping high-five. As I type, I’m thinking it would be fun to punch myself in the face. Not literally, but wouldn’t that be a great image?
We found this a fun way to spend part of an afternoon, and by wasting two lazy hours on a Sunday afternoon we now have a memorable Christmas card, and a lasting image that will always be uniquely ours. You can’t buy that off the shelf.
Merry Christmas, one and all. From the Greens. All of us. 🙂